This guide covers how to set up a basic DJ mix stream with a webcam and a set of decks, for livestreaming onto a platform like youtube or facebook.
So far we’ve done a Vessel 360 degree stream and set up Sideway’s first Club Virtual. This is based on what we’ve discovered in setting those streams up.
The guide is a work in progress. We only started learning how to livestream about a week or two before this was first posted. As we learn more we’ll keep adding to this!
Guides for adding graphics and videos to your stream, streaming a prerecorded set and streaming in 360 deg coming soon.
Navigation
To livestream a DJ set, you will need
- OBS (free open source streaming program)
- Computer
- Ethernet cable or excellent wifi
- Webcam
- Account on a live-streaming platform
- DJ cdjs/mixer and…
- RCA to 3.5mm jack and TRS to TRRS adaptor
- OR RCA to TRRS cable
- OR a USB Audio Interface
- OR DJ controller and DJ software (rekordbox, serato…) (we’re experimenting with this, instructions to come soon)
Setting up OBS
Download, install and open OBS. It’s a free and open-source software which allows you to put together a video stream to share on most streaming platforms, including facebook live, youtube live and twitch.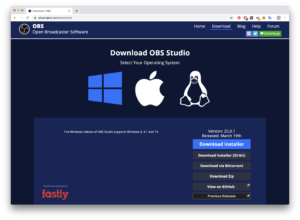
Create a scene
A scene is the canvas for all that is heard or seen in your livestream or recording. You can cycle between different scenes you’ve made to change what is shown and heard on the stream.
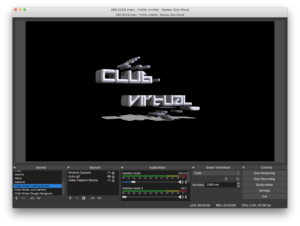
Use scenes to add titles, switch up visual effects, switch to in a new camera angle, share FaceTime videos of people tuning in at home, etc…
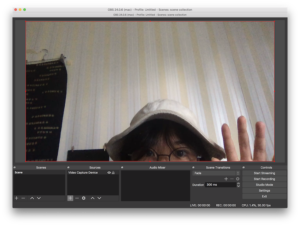
For now, we’ll just make a basic scene with just a video of you and the sound output of your decks.
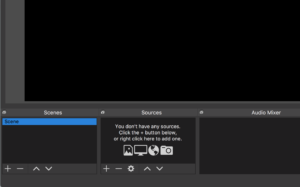
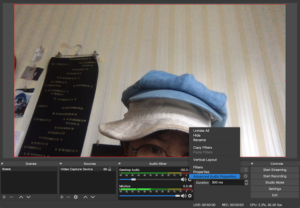
To make a scene, go to the scenes menu (bottom left corner of OBS) and press the plus sign if there isn’t a scene already there.
Set up your camera
Connect your webcam to your computer. You may need to install the webcam manufacturer’s driver.
Create a new Video Capture Device in Sources.

Select your webcam in the Device drop down.
 Position the video so it fills your scene’s canvas. Later, you can adjust the size of the canvas to fit your camera or any other things you might like to add.
Set up your sound
If you have a regular mixer, there are a few ways to connect your sound output to your computer.
RCA Output
Connect your RCA output to your computer through the 3.5 headphone jack using an RCA to 3.5mm cable and a TRS to TRRS adaptor.
A regular RCA to 3.5mm jack probably won’t work – the 3.5 jack only has two rings, while a microphone 3.5 jack has three rings. Alternatively, you can use an RCA to 3.5mm TRRS cable. This is how I connected my Pioneer XDJ RR to my MacBook.
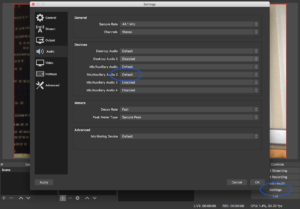
Open settings>audio>devices and set one of the Mic/Auxiliary Audio channels to your RCA output, which will probably appear as “External microphone” or “Line in”.
XLR Output
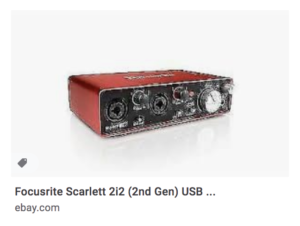
Connect your XLRs to a USB audio interface plugged into your computer. This is how sound was recorded in Sideway’s livestreams. We used a Scarlett 2i2 USB audio interface.
 As with the RCA output, open Settings>audio>devices and set one of the Mic/Auxiliary Audio channels to your USB audio interface.
Controller
If you have a controller, you may be able to use the output of your preferred DJ software. We haven’t done this yet so we have no advice to give for the moment. Will update soon!
Monitor your sound
By default, your audio sources output to the stream only. If you want to hear what is being streamed you need to change some settings.
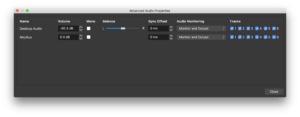
Press the settings button of any channel in the audio mixer. Open “Advanced Audio Properties” in the menu that appears. Change the “Audio Monitoring” of all the channels from “Monitor off” to “Monitor and Output”
Your scene – what you want to livestream – should appear the way you would like it to look and sound. Now we need to change some settings so we can stream it to your platform of choice.
Setting up the stream
Stream Key
To broadcast to a stream, you’ll need to get the stream key from whatever platform you are streaming on. Often, the stream key changes each stream. Some platforms offer the option of a persistent stream key, which means you use the same key each time you stream on the same platform.
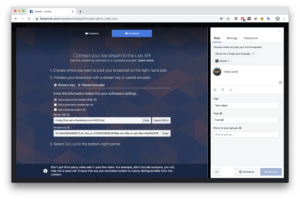
Facebook
Start a live video. Set the source to “Connected.” Copy the stream key.
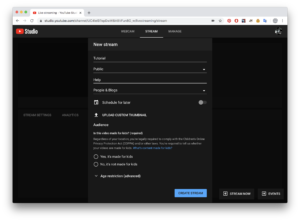
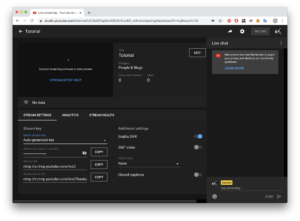
 Youtube
Start a live video. Open the stream tab, fill in your details and hit create stream.
 Other platforms
We haven’t really tried them out but it’s the same basic process.
Start streaming!
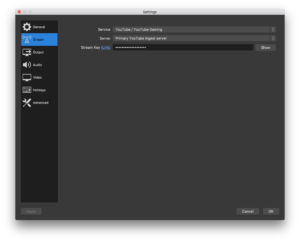
Open settings>stream. Select your streaming service. Paste in your stream key. Hit ok on settings.
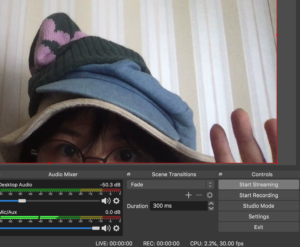
 In studio mode, press start streaming. A preview of your OBS scene should eventually appear on your streaming platform. Hit the go live button on your streaming platform to start streaming whenever you feel like it.
Streaming troubleshooting
Crap connection
You’ll need a pretty fast upload speed to handle a video. If you’re streaming a full HD (1920×1080px) video you’ll need about a 13mbps connection. You should probably use an ethernet cable instead of wifi. It’s a good idea to close any unnecessary programs or windows using the internet. Also, force your housemates to get off Netflix!
If your connection is slow where you’re recording your set, you could prerecord your set and stream it later, either by uploading your recording to a restreaming service or by streaming a prerecorded video of your set. We’ll cover that later.
Copyright muting
Some streaming services – facebook and youtube in particular – scan your stream for copyrighted material. If copyrighted material is found, your video may be muted or even abruptly ended. Usually a warning will pop up that says copyrighted material has been detected and you’ll have to manually resume the stream. You’ll need to constantly keep an eye out for this through your whole stream.
Fuzzy/Poor Quality Video
Before messing with video settings, check your internet connection. There’s a chance your livestream preview may be fuzzy because your internet is slow.
To fix a fuzzy video, there are several things to balance. The main ones to focus on are video bitrate, video resolution and video encoding/compression.
Bitrate
The number of videos bits processed or transferred in a second. The bigger the image and the less it is compressed, the more bits it needs to be displayed.
A 1920 x 1080 video with the encoder setting on slow will be big and sharp, but needs a high bitrate to be broadcast. A 640 x 360 video with the encoder setting on fastest will be small and fuzzy, but doesn’t need more than a very low bitrate.
If the bits in a video frame can’t be transferred fast enough, the whole picture may not come through or some of the video’s frames might be dropped. In the worst case, the whole stream might be forced to an end because too many frames were dropped.
If the quality of your video is low, you can increase the maximum bitrate in output>stream>video bitrate.
If you are live-streaming the video, there is no point changing the maximum video bitrate to to above around 3000 to 3500 kbps because most streaming services place a limit on your bitrate. If you are not streaming, but simply recording the video, you can set the video bitrate as high as you like.
Video resolution
To make the most out of a limited bitrate, you can reduce the size of your video in Settings> Video.
For reference, a full HD video is 1920 x 1080 px. To reduce the number of bits you have to process, you can edit your scene compositions at a regular video size and output them in a lower resolution
The bigger the difference between the canvas resolution and the output resolution, the more visual artefacts there may be. This is usually not a big problem unless the canvas and output resolutions are really different.
Video encoding
When your video is encoded, your visual and audio output is transformed into a file format that other programs can understand. You can adjust it in Settings>Output>Streaming>Encoder Preset.
The fastest encoding setting will process frames faster, produce a smaller file size and have a lower bitrate, but it will also produce a lower quality/fuzzier video. Conversely, the slowest encoding setting will produce a higher quality video, but it will take longer, produce a bigger file and have a larger bitrate. If your video encoder is too slow, your video frames may not get processed in time and may be dropped.
The speed at which your video can be encoded also depends on your computer. A faster computer can handle a slower encoding setting.
Overall, making your video quality to be the best it can be means you may have to experiment with different bitrate, video resolution and encoding settings until you’re happy with the result. For example, you could reduce the resolution of the video while using a slower encoding setting.
For reference:
Vessel’s most recent facebook streams have a canvas size of 1680 x 1050 and an output resolution of 1260×768. We used a maximum video bitrate of 3000kbps, maximum audio bitrate of 128 kbps and the “fast” encoding setting.
Sideway’s streams have a canvas size of 1920 x 1080 and an output resolution of 1152 x 648. We used a maximum video bitrate of 3300kbps, maximum audio bitrate of 160 kbps and the “medium” encoding setting.
Recording your stream
If you would like to have a video of your stream, you can also record it by pressing the start recording button at the same time you start streaming.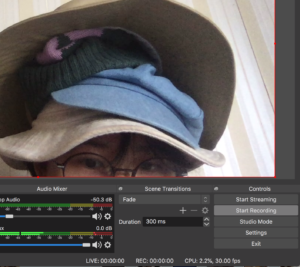
Change where the video file is saved in Settings>Output>Recording. You can also change the video file format there.
The default recording format is .flv. You can use the latest version of VLC to view flv files. The benefit of using .flv instead of more common video formats like .mp4 is that if OBS is interrupted because of a crash or a loss in power, you’ll still be able to use the recorded video file.
However, not all programs are able to open flv. To convert a .flv file to .mp4, open FLV and select File>Convert/stream. Drag the .flv file into the relevant area and press “Save as File.”
In the main VLC media player window, the media playing bar on the bottom will act as a progress bar for the file conversion.